Contributed By: Technopolis
Share This Experiment


Experiment Category:
Objective:
To demonstrate how ball bearings work.
What You Need:
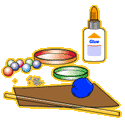
- Glue
- Small pieces of modelling clay
- A straw
- Small beads (to fit inside the straw)
- A piece of cardboard to mount your lid on
- Approximately 7 marbles of the same size
- 2 jar lids that fit together (one slightly bigger so that you can put one over the other)
To Do and Observe:
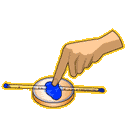
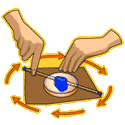
1. Stick the smallest lid to the base (cardboard) with a bit of glue (the open side upward).2. Seal one side of the straw with a piece of modelling clay. Then pour the beads into the straw through a funnel of paper or thin cardboard.3. Now also stuff the other side of the straw with clay.4. Take the second lid and put it on the table (with the open side downward). Fix the straw onto the closed side of the lid with a piece of modelling clay like a diameter.5. Now put the largest lid over the smallest one and try to make the mill turn. You'll probably have to keep on pushing to notice the effect.6. If you put the marbles between the lids (put in as many as you can, but make sure the marbles can still roll) and try to make it turn again, you'll notice the mill turns much faster and keeps on turning much longer.
What's Going On:
You've made a "ball bearing". A ball bearing consists of two parts (the two lids in this case), between which little balls can roll. These balls make it easier for the two parts to roll over each other. There are many kinds of ball bearings and they are used a lot. For example, there are ball bearings in your roller blades. Because the wheels roll so easily, they don't stop quickly. That's also why the wheels keep on turning when you fall.
Parent/Teacher Tips:
Try to find other examples of ball bearings in everyday items. How many can you find? Discuss other ways friction is reduced on parts that would otherwise rub together. Think of feats of engineering as well as biological joints.
